
Friday, December 31, 2010
Making a bucket o'margerita....
Following my lovely sista Miss Shannon O'Shea's recipe, you too can make a bucket o'margarita for tonight's New Year's Eve festivities! Enjoy!
Thursday, December 30, 2010
Christmas gifts for those who love all things food!
Well, Christmas has been and gone in quite the whirlwind fashion for us. There was lots of thoughts of our friends on the East Coast of the USA who were being belted by one hell of a blizzard while we were in a reasonable heat wave here.
We were incredibly lucky this year to have scored some beautiful items for Christmas from friends and family. Naturally our gifts seemed to revolve around all things food and cocktail like, making perfect gifts for us!
Some highlights in our Christmas stockings were:
Our gorgeous tangerine Kitchen Aid artisan mixer! At first I wanted aqua but was definitely swayed by this awesome colour (and the fact that we got it quite cheap too!) I can't wait to whip up a storm in the kitchen!
Mark received this very handy cook book for our Webber BBQ, a little smoke box and some Jack Daniels flavoured smoking pellets. The cook book has some fantastic and very inspiring recipes and I'm sure that the Jack Daniels smoking pellets will get a work out for New Years Eve celebration, most likely for some ribs.
Tupperware! I can't tell you enough how excited I get over Tupperware. My parents are always awesome at getting some of the bigger and more expensive pieces for us at Christmas time. They are always the pieces that I say to myself "I'm going to buy that this year" but never get around to it. This year we received the potato and onion keepers which stack nicely in our pantry.
Our friend David went to great lengths to obtain this super cute Marimekko Christmas table runner! I'm sure that this will become our holiday table runner for many, many years.
We also splurged on some gifts for ourselves (and our friends too!) including a gorgeous Laguiole cutlery set each for us and the Coopers. I just love the bright colours and the knives cut through steaks like butter! There is something so cheery about having colour in the kitchen, it makes for some very happy dinner parties. It's soooooo pretty that it may have to feature in it's own blog post!
Was Santa kind to you in the foodie gifts? I sure hope so! Let me know what kitchen essentials came out of your santa stocking!
We were incredibly lucky this year to have scored some beautiful items for Christmas from friends and family. Naturally our gifts seemed to revolve around all things food and cocktail like, making perfect gifts for us!
Some highlights in our Christmas stockings were:
Our gorgeous tangerine Kitchen Aid artisan mixer! At first I wanted aqua but was definitely swayed by this awesome colour (and the fact that we got it quite cheap too!) I can't wait to whip up a storm in the kitchen!
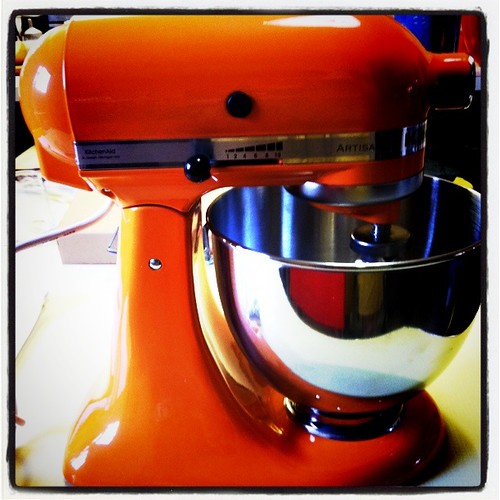 |
| It's super tangerine! |
Mark received this very handy cook book for our Webber BBQ, a little smoke box and some Jack Daniels flavoured smoking pellets. The cook book has some fantastic and very inspiring recipes and I'm sure that the Jack Daniels smoking pellets will get a work out for New Years Eve celebration, most likely for some ribs.
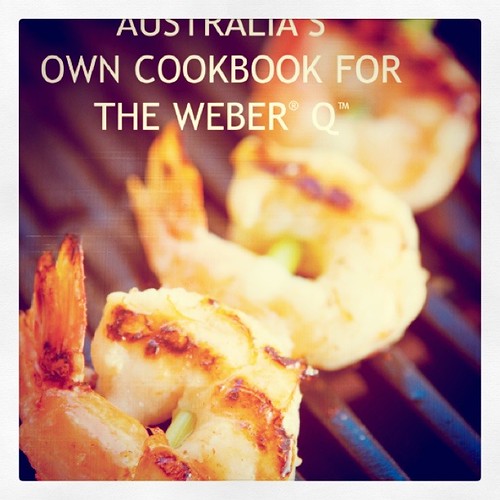 |
| Mark's most excellent BBQ cookbook. |
Tupperware! I can't tell you enough how excited I get over Tupperware. My parents are always awesome at getting some of the bigger and more expensive pieces for us at Christmas time. They are always the pieces that I say to myself "I'm going to buy that this year" but never get around to it. This year we received the potato and onion keepers which stack nicely in our pantry.
 |
| Our beautiful Marimekko table runner. |
Our friend David went to great lengths to obtain this super cute Marimekko Christmas table runner! I'm sure that this will become our holiday table runner for many, many years.
We also splurged on some gifts for ourselves (and our friends too!) including a gorgeous Laguiole cutlery set each for us and the Coopers. I just love the bright colours and the knives cut through steaks like butter! There is something so cheery about having colour in the kitchen, it makes for some very happy dinner parties. It's soooooo pretty that it may have to feature in it's own blog post!
Was Santa kind to you in the foodie gifts? I sure hope so! Let me know what kitchen essentials came out of your santa stocking!
Saturday, December 4, 2010
Food Shopping...
 |
| first thing on a Sunday morning at ALDI, notice no makeup! |
Food shopping. We all need to do it and sometimes it's fun and sometimes it's a real chore! We shop all over the place for food ingredients. Every week we get a box of organic fruit and veggies from Organic Angels. It gets delivered straight to our house and we have been doing this for close to three years now! I love having the box delivered as it's one less thing that I have to go out and do during the week and if we are a little slack in getting to the supermarket, I know that we have some tasty and healthy food to cook with.
We also do a lot of our 'staple' shopping at ALDI. I so wasn't into this place but then my mum started to get weird delicious treats (such as cheap German beer and sauerkraut) and I thought I would give it ago. We go every fortnight to stock up on tinned tomatoes, mineral water and all of that sort of stuff but they also have some delicious seasonal treats. At the moment I'm loving their wild cranberry sauce on turkey sandwiches. I also like some of their crazy packaging too, especially the breakfast cereal cheetah!
I really enjoy shopping locally for food. I love my butchers that are a five minute walk from the house and pop in often after work to pick up a steak or some lamb. The wonderful guys are always on for a chat and I love having a laugh with them and getting them to specially cut something for me. I think it's important to support these little shops that have been there for ages and are experts in what they do! We are lucky to live nearby a great butcher and baker, we constantly get great produce at a very reasonable price.
We do have a farmers market in the area as well but I always seem to be too busy in the morning to visit! I do hear good things about it and love the fact that people are returning to buying directly from the growers. In our case we also have lots of things growing away in our garden too, which you can't get much fresher!
So where do you shop? Do you love it and enjoy the experience of selecting great produce or do you think that it's another chore for the weekend! Let me know!
Sunday, October 31, 2010
Halloween baking...

Using the gingerbread recipe that I posted a little while ago and the really cute cookie cutters that I purchased for $2.99 at Aldi (yes I know, $2.99!!), I made these cute Halloween themed cookies today.

There are scary Jack O Lanterns, vampire bats and skulls to munch away on. The Jack O Lanterns were a little tricky to ice but they still have Halloween spirit.

And keeping with the Halloween spirit, here is a 'zombiefied' me to get you in the Halloween spirit! Happy Halloween!
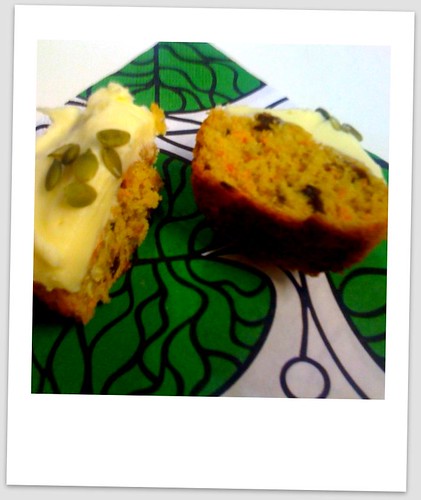
Recipe Remix: Teeny, tiny carrot cakes... with a ginger twist!

So you know these teeny, tiny carrot cakes that I love to make? Well, I decided to add a little fresh ginger twist to them! It is super delicious and makes them lovely and fragrant too. If you follow the basic carrot cake recipe ( I posted it here) and add a good tablespoon of freshly grated ginger to the batter, you too will have the ginger twist too! Just make sure that you use one of those fine ginger graters, you don't want big chunks in your little cakes!
Sunday, October 10, 2010
Gingerbread goodness...
 |
| gingerbread fox. |
I've always loved gingerbread ever since I was a child. There is nothing better than a beautiful gingerbread man with cute iced clothing and raisin eyes. I especially love the spiced biscuit. I was inspired to make gingerbread recently for two reasons. Firstly I had come across some Swedish gingerbread spice mix that I picked up from Nord Living. It's by the company Two Swedes Cooking.
Also I bought some cute cookie cutters from Ikea that I have used for my gingerbread. They have cute foxes, squirrels and moose!
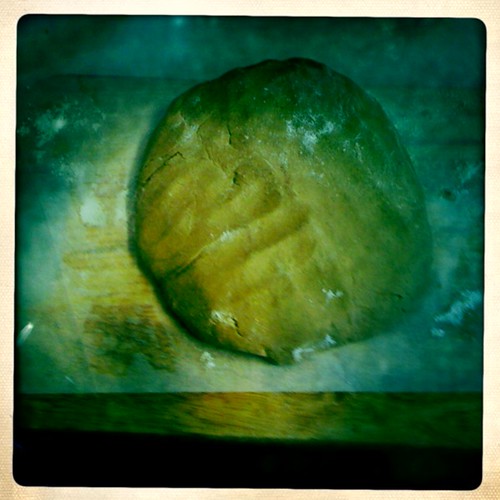 |
| gingerbread dough ready to go into the fridge. |
For this recipe I used my Swedish gingerbread spice as a replacement for all spices but you can use the spices listed below!
Ingredients
- 125g butter, at room temperature
- 100g (1/2 cup, firmly packed) brown sugar
- 125ml (1/2 cup) golden syrup
- 1 egg, separated
- 375g (2 1/2 cups) plain flour
- 1 tbs ground ginger
- 1 tsp mixed spice
- 1 tsp bicarbonate of soda
- Plain flour, to dust
- 150g (1 cup) pure icing sugar, sifted
 |
| gingerbread waiting to go into the oven. |
How to!
- Preheat oven to 180°C. Prepare trays with baking paper.
- Use an electric beater to beat the butter and sugar in a bowl until pale and creamy. Add the golden syrup and egg yolk and beat until combined. Stir in the flour, ginger, mixed spice and bicarbonate of soda. Turn onto a lightly floured surface and knead until smooth. Press dough into a disc. Cover with plastic wrap and place in the fridge for at least 30 minutes to rest - up to over night if you have time!
- Meanwhile, place egg white in a clean, dry bowl. Use an electric beater to beat until soft peaks form. Gradually add icing sugar and beat until stiff peaks form.. Cover with plastic wrap and place in the fridge.
- Place the dough between 2 sheets of baking paper and roll out until about 4mm thick. Use a cookie cutter to cut out shapes. Place on trays about 3cm apart. Repeat with any excess dough.
- Bake in oven for 10 minutes or until brown. Remove from oven. Transfer to a rack to cool.
- Place prepared icings in small plastic bags. Cut a small hole in a corner of each bag. Pipe icing over gingerbread to decorate.
 | |||||
| they are finished! |
This is what happens when you share cupcakes...

You get a weird hybrid cupcake made by your loving husband! Thanks to Sugadeaux for the lovely cupcakes, we have pistachio/ cardamon on the left and a salted caramel on the right. Mark thought it was pretty funny to serve this up for morning coffee!
Monday, September 27, 2010
Silverbeet and Cheese pie... and loving the spring form pan!
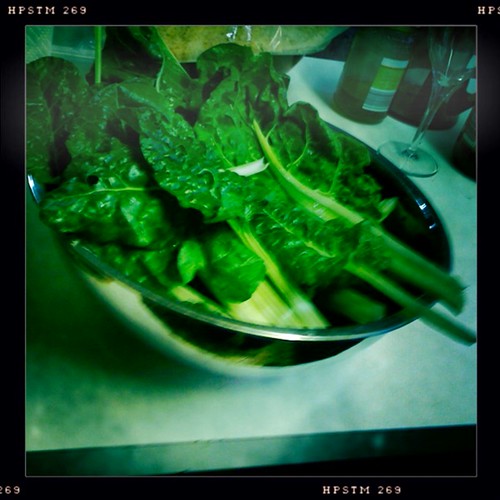 |
| whole lotta silverbeet, straight out of our garden! |
If you've been reading this blog, you would know that we have ventured into growing our own vegetables. In the last couple of weeks our silverbeet has been going crazy so I thought that I would whip up a silverbeet and cheese pie that references the lovely Greek 'Spanakopita' as well as the Maltese 'Pork and Pea' pie!
Although this isn't a recipe as such, I thought I would give you my tips for what I think makes an awesome Silverbeet and Cheese pie!
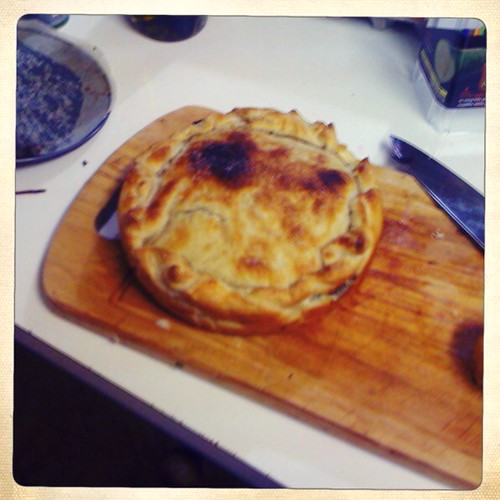 |
| pie out of the oven! |
I used puff pastry (yep, the kind from the frozen foods section of the supermarket!) for this pie and by using 2 sheets in a spring form pan and roughly folding over the edges to encase the filling, it gave it a lovely 'rustic' look.
When it came to combination of filling, these elements are important:
- lightly cooked garlic and red onion, gives it a great sweet flavour.
- A combination of greek style fetta (I use Dodoni brand), some ricotta and freshly grated parmesan. I use mostly fetta, little less ricotta and less parmesan.
- lemon zest!! It freshens the whole thing up and gives it zing and zang1
- good dose of salt and pepper.
- when cooking the silverbeet, lightly cook it - don't kill it! You want it to be a lovely green colour still.
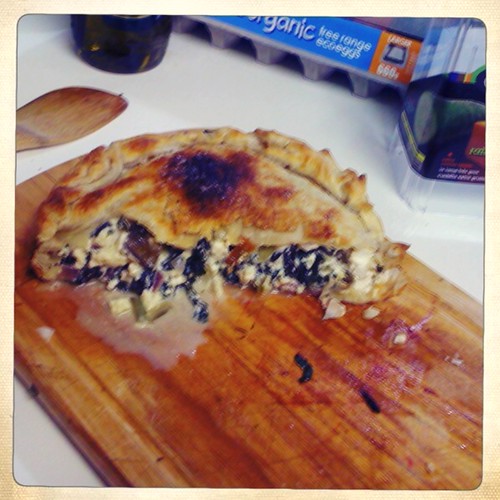 | |||
| Yep, we've eaten into it! |
Sunday, September 26, 2010
Bison ceramic tea bowls..

I am completely addicted with Bison ceramic goodies. I recently picked up these tea bowls for our morning coffee. They feel great in your hands. Check out the Bison website for all sorts of lovely goodies that they make and they array of beautiful colours that they come in! It's all made in Australia too!
Saturday, September 25, 2010
Delicious butter biscuits... a basic recipe...
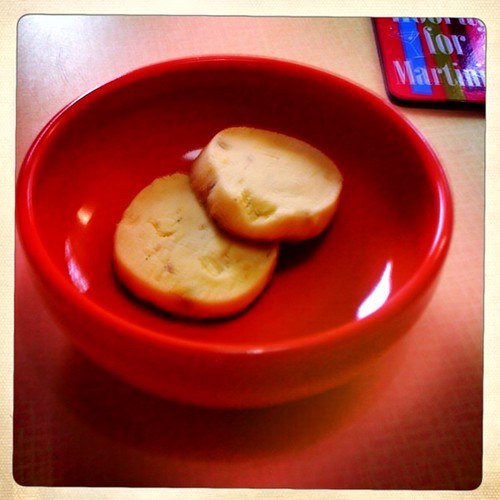
I found this basic butter biscuit recipe and thought that I would give it a go with my own flavours. I tried it with pistachios, lemon and some white chocolate bits. Where those flavours came from, I'm not sure but it was pretty tasty.
Basic butter biscuit mix:
Ingredients:
- 250g butter softened
- 1 cup icing sugar
- 2 and 1/2 cups plain flour
How to put it all together!
- beat butter and sifted sugar in a small bowl with an electric mixer until smooth and changed to a lighter colour. Transfer mixture into a large bowl, stir in flour, in two batches.
- knead dough on a lightly floured surface until smooth. Divide dough in half; roll each into a 25cm log. Wrap in plastic wrap, refrigerate about 1 hour or until firm.
- preheat oven to 180 degrees celcius. Grease oven trays; line with baking paper.
- cut logs into 1 cm slices; place slices on trays about 2 cm apart.
- bake biscuits about 10 minutes or until browned lightly. Transfer biscuits onto wire rack to cool.
- lemon and pistachio, add 1 teaspoon of finely grated lemon rind into the butter and sugar mixture then add 1/3 cup of chopped pistachios and 1/3 cup of white chocolate bits.
- chocolate choc chip, add 2 tablespoons of sifted cocoa powder to butter and sugar mixture, add 1/4 cup of chopped choc bits before adding the flour.
Friday, September 17, 2010
Sugadeaux Cupcake Sampler and the tell-tale heart...

Like the tell-tale heart, I have a box of 5 cupcakes that form this month's Sugadeaux Cupcake sampler sitting on my desk. It's like the tell-tale heart as I promised I would wait to take them home and share them with my husband but they are sitting on my desk saying "eat me! Eat me!" It's driving me crazy!
To be serious though, this is a great way to get to taste some different flavours without making the 'whole case purchase' commitment. This month's flavours are a real sample bag and include:
Black and white
Sour gummy (including an adorable sour worm on top!)
Wattle seed and macadamia nut
Lychee Jasmine
Mexican chili chocolate
The next box is available on the 22nd October, visit her website for what will be in it and to get your order in!
Thursday, September 16, 2010
Curry Spiced carrot soup with apples...
 (you will need quite a few of these guys!)
I had this soup at the New England Soup Factory in Boston last year. It was so delicious that I have been trying to replicate the recipe. Yes, the New England Soup Factory folk do have a book with their amazing recipes, however this one wasn't in the book!
So here is my take on this recipe.
You will need:
- about 750 grams to a kilo of carrots.
- one small sweet potato.
- 2 sticks of celery (with leaves)
- one small brown onion chopped
- one small red onion chopped
- 2 small granny smith apples, peeled and chopped into quarter style
- approximately a litre of vegetable stock
- 3 heaped teaspoons of mild curry paste ( I used a korma style with coconut and coriander)
- half teaspoon of minced ginger
- pinch of cumin seeds
- coriander chopped for garnish
- 2 heaped tablespoons of coconut cream (to taste)
- 2 teaspoons of samba olek (chilli to taste!)
- pop onions and celery in a heavy based pot with a good splash of olive oil and sweat down.
- add the sweet potato and carrot and heat through for a few minutes until all ingredients are covered with the oil.
- add the curry paste and ginger and toss through to cook off.
- add the stock and simmer with lid on until all the ingredients are soft and starting to fall apart.
- using a stick blender, blend the soup until smooth.
- add the other flavours, salt and pepper, cumin seeds, samba olek and coconut cream. Add more coconut cream if you prefer a creamier soup.
- add the apple and put pot back on a low heat, covered for around 5 minutes or until the apples have softened.
- Serve garnished with freshly chopped coriander.
Let me know how you go if you try these recipe! Miss Mardi xxx
Thursday, August 26, 2010
New York City Cocktails!

As I was in New York City recently during the much warmer weather, I thought that I would be a little more daring than my usual dirty martini and give the above cocktail a try!
It's a Raspberry Vodka Lemondrop martini! It was super delicious. I'm not really sure how it was made but it did include raspberry infused vodka and a homestyle lemonade and had a lovely raw sugar crust! I had it at Eatery in NYC and loved it so much that I had two!
I will be giving it a go myself so stay tuned for the outcomes!
Teeny Tiny Carrot Cakes
I am quite the fan of carrot cake. I'm not sure where this addiction came from but every now and then (particularly when we have loads of carrots!) I whip up some of these teeny tiny carrot cakes.
Ingredients:
- 2 medium carrots grated
- 1/2 cup of olive oil
- 3/4 cup of light brown sugar
- 1 cup of self raising flour (you can use a half/half combo of normal and wholemeal)
- 1/4 cup of chopped walnuts
- 1/4 cup of sultanas
- 3 tablespoons of pepitas
- 2 eggs
- 1/2 teaspoon of all spice
- mix the sugar, eggs and oil together well and then mix to the other ingredients.
- pop tablespoons of mixture into 12 lined cupcake/muffin pans.
- bake in a pre-heated oven at 180 degrees celcius for between 20 to 25 minutes
- cool!
You can ice these beauties with a lovely cream cheese icing or eat just as! They will stay fresh for a few days as long as they are kept in an air tight container. I like to take these as a bit of an afternoon snack at work!
Saturday, June 19, 2010
National Sparkling Red Day
Did you know that there is a National Sparkling Red Day?! Well this year it was on Tuesday 15th June and I celebrated with a couple of bottles from my lovely friend David's cellar, great company and some gorgeous food!

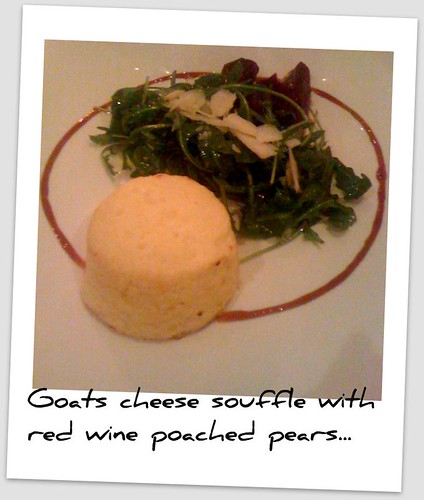
I do love a sparkling red, especially with food and particularly with cheese. It seemed the perfect accompaniment to a cold Melbourne's evening and we selected a local Italian restaurant, Di Palmas, to celebrate the National Sparkling Red Day. The starter and main that I chose was an amazing goats cheese souffle with red wine poached pears. This light souffle and pears went perfectly with our first wine, I'm practically drooling just thinking about it! For main I went with a pizza with salami, goats cheese, peppers and anchovies. It was a great gutsy and robust meal to have with a sparkling red wine and I actually love to eat pizza with my hands, even in a posh restaurant!
Anderson's of Rutherglen 2000 Sparkling Shiraz and Hollick's 2004 Sparkling Merlot
(click on the wines to get a little more information about them).
The Rutherglen 2000 Sparkling Shiraz was amazing. It had the perfect amount of bubbles, was creamy, a gutsy red but incredibly smooth. It had some great complexities of flavour that you sometimes don't get in a sparkling red and we all agreed that we would try and hunt down some more of this one!
The Hollick's 2004 Sparkling Merlot had an unusual nose and after taste and at first we weren't that in to it but I did warm to it when I had it with food. It unfortunately didn't stand up to the Rutherglen but you often get that, one will appeal more than another wine.

So, when did National Sparkling Red Day start? Well, it is now in it's 19th year with the first annual celebration starting back in 1991. Always held in June, it appears that a secret society of sparkling red wine lovers all come out to enjoy and celebrate their love of the deep red bubbles.

Having been a fan of the 'red bubbles' myself, I can see this celebration becoming an annual tradition for us with our friends who also like to indulge in these gorgeous sparkling reds.

The celebrations don't always have to be big and elaborate but why don't you think about getting some friends together with some lovely simple Italian style foods, a couple of bottles of sparkling red wines and celebrate with us for the 20th National Sparkling Red Day next year?! I know from our experience that this will become an annual get together for us but don't wait till next June to try some great 'red bubbles'!
Monday, June 14, 2010
Cute food blog...
I stumbled across this great foodie blog called Sunday Suppers. The blog is based in Brooklyn, New York and has gorgeous food photography as well as some great recipes that just make you want to pop your apron on!
I would suggest that you check them out! While you are looking at their delightful recipes I will leave you with a photo of a delicious martini that I had the other night!

Enjoy!
I would suggest that you check them out! While you are looking at their delightful recipes I will leave you with a photo of a delicious martini that I had the other night!
Enjoy!
Friday, May 28, 2010
Who knew that hedgehogs were so tasty?
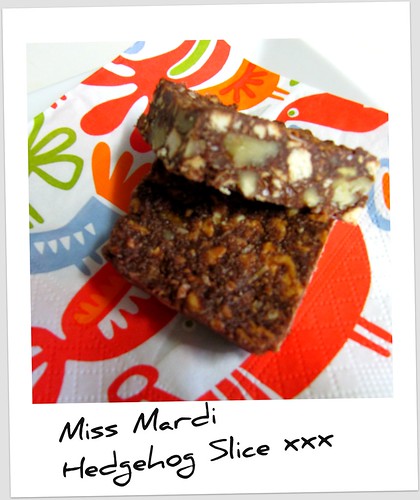
Ah, the Hedgehog slice... it's a childhood favourite for me. I love that fact that you get to bash a whole heap of biscuits to make biscuit crumbs and that it is no bake! I have to admit that I have had my fair share of kinda dry and tasteless hedgehog slices so here's my recipe for delicious, chocolatey and nutty goodness!
I base my Hedgehog slice recipe on the never fail one from Cookery the Australian Way Book.
Miss Mardi Hedgehog goodness: (I use a baking paper lined 27 x 18cm tray for this recipe
Ingredients:
- 240g of sweet biscuits crushed, I use one packet of Arrowroot biscuits, generally the Aldi brand ones.
- 3/4 cup of well chopped walnuts.
- 1/2 cup of caster sugar
- 2 heaped tablespoons of good quality cocoa powder (I use cadburys)
- 1 egg beaten
- 2 tablespoons of shredded coconut
- 1-2 teaspoons of vanilla essence.
- 175g of margarine (I use an olive oil based one)
- pop your biscuits into a plastic bag, then beat with a rolling pin to make crumbs. I like a combination of breadcrumbs and some chunkier pieces.
- put crushed biscuits into a bowl with the chopped walnuts and the coconut.
- in a small saucepan add margarine and caster sugar, heat gently until the margarine has disolved.
- take off heat and add the cocoa and vanilla. Stir well until shiny and well combined. During this time, the mixture is cooling. When slightly cooler, add the beaten egg and quickly combine.
- add the wet mixture to the biscuit mixture and combine well.
- press mixture into the pan with a metal spoon, press well so it is flat!
- place in the fridge until chilled and hard.
- remove from pan and cut into squares.
I have often wondered why this slice is called Hedgehog? Does anyone know?!
Saturday, May 15, 2010
The joys of a perfect martini...
I'm going to slightly blame my New York City friend Billy for this as I got a message from him saying "I'm drinking a Belvedere with soda and thinking of you". My mind went back to all those times that I've enjoyed Belvedere vodka in my favourite city and wouldn't you know it, I was craving a perfect dirty Belvedere martini!

What is a girl to do when this happens? Well lucky for me, I could pop across the road to Baranows Lounge and get the delightfully cheeky Leigh Oliver to whip a couple up for me. I have to say that it had been awhile since I have enjoyed a dirty martini seeing the vodka gibson has been my drink of choice for awhile but that slightly salty, yet creamy from the grain vodka liquid sure hit the spot. I may have enjoyed three but I'm sure a bartender never tells? (Right Leigh!)
I don't even remember when I first started drinking martinis. I can remember some badly made martinis and I can remember when I get perfection in a glass. I believe that everyone enjoys their martinis differently. Some people prefer really dirty, others heavy on the vermouth. So for me, here is what I call a perfect martini.
I don't even remember when I first started drinking martinis. I can remember some badly made martinis and I can remember when I get perfection in a glass. I believe that everyone enjoys their martinis differently. Some people prefer really dirty, others heavy on the vermouth. So for me, here is what I call a perfect martini.
- It must be made with Belvedere vodka... the grain based alcohol gives a slightly creamy nature to the drink.
- light on the vermouth. I often at home pour it into the glass, run it around so it coats, tip it out and then ice the glass.
- lightly dirty. I like around 2 bar spoons of brine from the olives. Just remember that they can't be any oil in that brine! You don't want an oil slick on your martini.
- I always have 3 olives in my martini, it's part superstition and part aesthetics. The olives can't be too big (like giant Greek olives) they must be green olives too. My favourites are a Turkish olive stuffes with an almond. The flavour and brine added to the dirty martini gives a slightly nutty effect which I go crazy about!
- Glassware. It's a martini as it's in a martini glass... the glass must feel good in your hand, have an appropriate thickness to the glass but not too thick and it must be classic looking.
Gosh, all this talk of martinis is making me thirsty! I think I'll be heading back to the bar about now! (Leigh, you can start getting one ready... I'm heading over! )
Sunday, April 11, 2010
Home made granola goodness
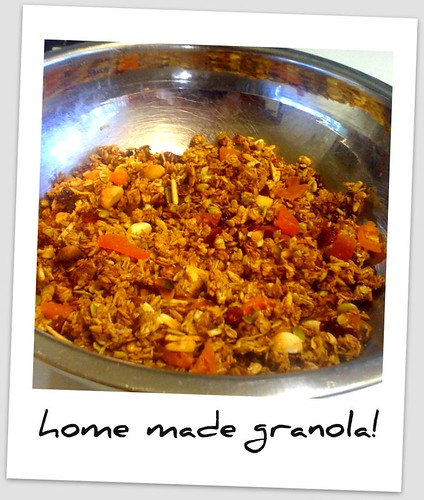
I've always been a fan of a toasted muesli with yogurts. While I was on long service leave in the USA for three months, I became besotted with granola. I ate it everywhere, I even had granola coated french toast (which by the way is awesome!) So seeing I've had all these ingredients floating around for muesli bars, I thought I'd try my hand at my own granola.
As a starting point, I found these great website and used the recipe they posted as a starting point. You can check the original recipe titled Easy Homemade Granola
from "Baked: New Frontiers in Baking" by Matt Lewis and Renato Poliafito on The Amateur Gourmet here! I recommend looking at their site... very cute!
My ingredients:
2 cups rolled oats
1 teaspoon cinnamon
1 teaspoon salt
3 tablespoons or good quality olive oil
1/4 cup honey
1/4 cup firmly packed dark brown sugar
1 teaspoon pure vanilla extract
1/3 cup slivered almonds
1/3 cup macadamia nuts
1/4 cup sunflower seeds
then sprinkling to taste of shredded coconut, linseed and pumpkin seeds, craisins and chopped dried apricots.
How to!
Preheat the oven to 165 Celsius. Line a baking sheet with parchment paper.
In a large bowl, toss the oats with the cinnamon and salt.
In a medium bowl, stir together the oil, honey, brown sugar, and vanilla. Whisk until completely combined.
Pour the honey mixture over the oats mixture and use your hands to combine them: Gather up some of the mixture in each hand and make a fist. Repeat until all of the oats are coated with the honey mixture.
Pour the mixture onto the prepared baking sheet. Spread it out evenly, but leave a few clumps here and there for texture.
Bake for 10 minutes, then remove from the oven and use a metal spatula to lift and flip the granola. Sprinkle the almonds over the granola and return the baking sheet to the oven.
Bake for 5 minutes, then remove from the oven and use a metal spatula to lift and flip the granola. Sprinkle the nuts and seeds over the granola, stir in and return the baking sheet to the oven.
Bake for 10 minutes, then remove from the oven. Let cool completely. Sprinkle the dried fruit over the granola and transfer it to an airtight container.
The granola will keep for 1 week.
I love mine with just plain yogurts and some poached fruit on top... delicious!
Sunday, April 4, 2010
Recipe Remix: A nutty take on Anzac biscuits...
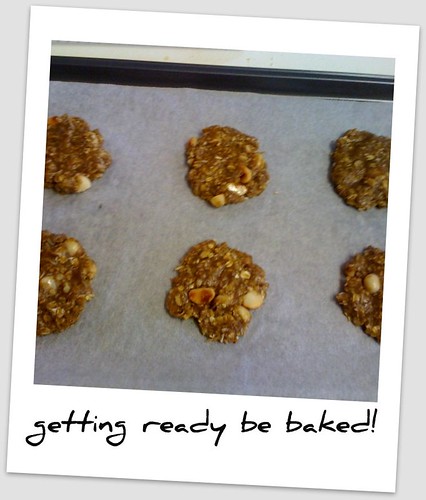
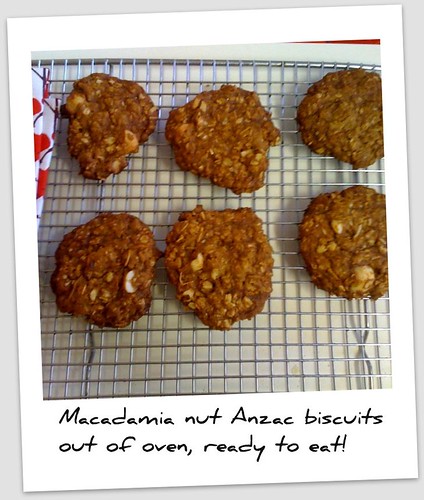
I really do love Anzac biscuits. I picked up a large packet of macadamia nuts really cheaply at the supermarket and I've been trying to think of what to make with them!
I decided to lightly roast some of the macadamia nuts in the oven for a few minutes, crush a little bit and add about 1/2 cup of them to my existing Anzac biscuit recipe. Click here to get a refresher on the recipe!
The result? Pretty darn delicious! I don't think that they will be lasting long in our house. I think I've already eaten three!
What do you do when you grow loads of rocket?
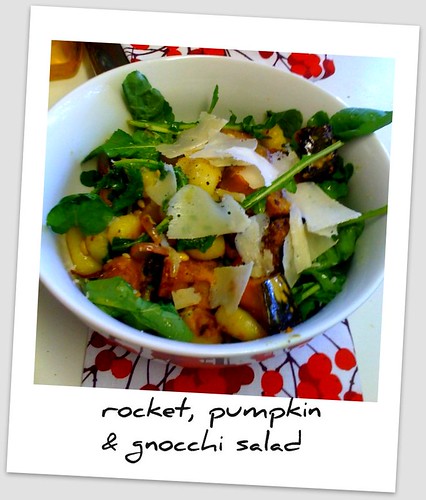
The rocket that we are growing in our front garden is going crazy! It is growing at such a rate that we are trying to eat rocket just about every day. It's great though, having your own salad in the front yard where we just pop out with scissors, grab some and make a delicious salad.
I've always been a bit of a rocket fan. I love the slight peppery taste and it's lovely just as a simple leafy salad or slightly cooked in a warm salad.
To use some of rocket supply today, I made this very quick and simple warm salad that comprised of:
- rocket (duh!)
- finely sliced red onion lightly cooked
- roasted kent pumpkin
- pine nuts
- potato gnocchi
This was lightly tossed and seasoned with olive oil and lemon juice (to cut through the 'roastiness') and served with fresh shaved parmisan cheese.
A great way to start using up that rocket and also a great Easter Sunday brunch dish.
A great way to start using up that rocket and also a great Easter Sunday brunch dish.
Friday, April 2, 2010
I want a Japanese Iceball Maker!

While researching our Pimm's winter cup recipes, we stumbled upon this Japanese iceball maker. They create a perfectly spherical ball of ice in this machine without using electricity. The only downer is that you need to have a supply of chunks of ice but I think that the outcome is pretty spectacular! I can just imagine myself sipping a Belvedere vodka on 'the rocks' but rather it would be a Belvedere on the iceball or just a Belvedere on the rock (singular!)
The amazing thing is that apparently there were guys who used to make these balls of ice using knives! It was a very dangerous practice and obviously required much skill. This machine means that you won't lose any fingers in the process.
Yep, I definitely want one of these gadgets for my bar!
(thanks to Drinksology for the awesome Youtube clip on how it works!)
Pimm's Winter Cup

Mark and I went on a little adventure last weekend to restock our bar. It was starting to look a little low so we popped by our favourite little European style bottle shop and picked up some goodies. We then ventured to Acland Street Cellars in St.Kilda, who are apparently opening up an on-line store soon, very exciting! Anyway while we were in Acland Street Cellars, we discovered that they had not just normal Pimm's Cup #1 but also Pimm's Cup #3!!!
A little educational lesson here... Pimm's #1 is made from a gin base, Pimm's #3 is a brandy base, lending itself to a variety of other drinks; including the Pimm's #3 Winter Cup!
To make yourself a Pimm's #3 Winter Cup you will need:
A little educational lesson here... Pimm's #1 is made from a gin base, Pimm's #3 is a brandy base, lending itself to a variety of other drinks; including the Pimm's #3 Winter Cup!
To make yourself a Pimm's #3 Winter Cup you will need:
- 150ml / 5oz Pimms No. 3 Winter Cup
- 400ml / 14oz apple juice
- 1 apple, sliced in to small chunks
- ½ an orange, sliced in to chunks
- 1 cinnamon stick

While researching more above the spiced and warming Pimm's #3 Winter Cup, we discovered the lovely Pimm's teapot cosy as seen above! They were promotional gifts in the U.K but I may have to pull my knitting needles out and make my own!
So if you are looking for a lovely winter drink to warm you in the cooler months, give this one a go!
So if you are looking for a lovely winter drink to warm you in the cooler months, give this one a go!
Our wedding cake...

This is a bit of a belated post but my lovely Mark and I got married on Sunday 7 March. It was a small wedding and held at our favourite bar, Baranows Cigar Lounge in Hawthorn. The ever amazing Jess from Sugadeaux (yep, I know, I've posted loads about them!) did our cupcake tower for the day.
As our wedding had a bit of a Deco theme, we decided upon a square cupcake stand and some lovely muted colours and dark browns, which looked amazing in the venue. The topper cake had a ribbon which was held together with one of my brooches.
The two flavours on the day were salted caramel which is one of Mark's all time favourites and the Persian delight which has pistachio and cardamon flavourings... yum! They were certainly enjoyed by all on the day! (thanks to Jess... she really is one of the best cupcake makers around!)
Graffiti and food.. what?!

My sister Shannon put me onto this article as she said that I needed "some street for my food blog'. Thanks Shannon! It's about a German company which has created edible spraycan paint. They have used the idea that if your too scared to go and 'tag' your neighbours fence, you could use this product as it will wash away, or maybe you could lick it away? I'm not sure. It's an interesting idea, especially the idea of using the product to stencil cakes and other food items.
I have to say that I love the image above of the spraypainted gold tomatoes! What a way to spice up a dinner party.
Thanks Miss Shannon for this article!
I have to say that I love the image above of the spraypainted gold tomatoes! What a way to spice up a dinner party.
Thanks Miss Shannon for this article!
Sunday, March 14, 2010
Breakfast in a pan...

I've become a fan of baked eggs. I'm not really sure when this started but there is something very comforting about a bunch of delicious ingredients sizzling away in a cast iron pan and breaking into the egg sitting in the middle!
While I was in Boston, I came across these fantastic cast iron pans that just screamed "baked eggs" to me. I had been looking around for pans just like this in Melbourne but hadn't found any that were they right size or depth. I bit the bullet and bought these incredibly heavy cast iron pans and carted them around the USA and eventually back to Australia. From the picture above, you can see that it was well worth the carting!
I made the dish above this morning for breakfast. It doesn't have a particular recipe and if you try it at home, you can add what ever you want but here is kind of how I did it and what I learnt!
- Make sure all our ingredients are prepped and ready to go. This baby cooks quickly!
- I chopped and par cooked 2 potatoes.
- in the cast iron pans add a little oil and start to fry off some red onion rings. Add the potatoes until they get a little colour.
- add some fresh roughly chopped tomatoes, quickly stir then add some good quality passata di pomodora (Italian style pureed tomato sauce) and leave to bubble away. It will reduce quite quickly.
- I added 2 tablespoons of Mexican style beans (yep, the kind from a can). These are great for this dish as they are flavoured and have chopped peppers in there as well. You could make your own beans to add. Slightly mix in beans.
- When the sauce is looking like it's cooked around the edges, crack a fresh organic egg into the middle of the sauce. Season dish with salt and pepper.
- I added a little grated cheese and put the pans under the grill for a couple of minutes to brown.
- Serve with Tabasco or hot sauce, avocado and fresh chopped coriander and tortilla chips!
Sunday, February 28, 2010
The Bloody Mary Martini..

One thing that I enjoy most is a good martini made from good quality Polish vodka. Though on the weekends I love a good Bloody Mary with brunch. My partner Mark is pretty amazing at making both and I have been completely spoilt with many fabulous cocktails.
While trying to come up with our final list of cocktails for our wedding next weekend, we decided that we really wanted a Bloody Mary on the list. Some say that the Bloody Mary was invented in 1921 at Harry's Bar in Paris and as our wedding party is based on the roaring 20s, it seems appropriate to have a Bloody Mary. Problem; our bartenders don't love making Bloody Mary's and they aren't the most sophisticated looking of drinks. Solution; a Bloody Mary Martini! I have to give kudos to the Belvedere website for the inspiration on this!
Ingrediants:
50ml Belvedere Citrus (we used normal Belvedere and added a dash of fresh lemon)
6 Cherry Tomatoes
10ml Simple syrup (you will need to make this - it's a basic bar sugar syrup)
4 Dashes Tabasco
Muddle tomatoes with simple syrup. Add rest of ingredients and shake with cubed ice. Fine strain into a chilled coupe or martini glass. Garnish with a small piece of basil.
Our verdict... beautiful, fresh and sophisticated. Will go amazingly with entrees and you could team it up with a serve of saganaki or even a gourmet mac and cheese (think with pancetta and truffle oil!). We think that it probably is best with the Belvedere Citrus as it has a subtle flavouring and when you first make this, go easy on the Tabasco for tasting. Next time, we will serve with a skewer of fresh cucumber to really lift the freshness and give it the Bloody Mary look. Definitely worth a try!
Grown your own supplies!
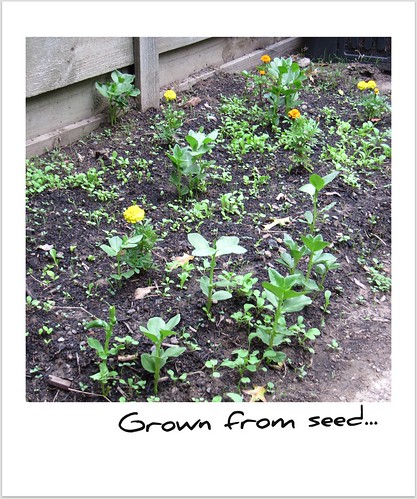
As both my partner and I work full time and live pretty busy lives, we get a weekly delivery from Organic Angels of mixed seasonal organic fruit and vegetables. I started to do this as it was really convenient to have it delivered to our house and also it actually made us cook more as we had all these great veggies. We also began to become more inventive with our cooking as we were supplied with items that we may not necessarily buy for ourselves.
I guess the more vegetables that we ate, the more we thought about growing our own. We have had herbs and chillies and things like that but when you rent a property, you're not always keen to spend the time into the garden that isn't yours!
Though with such a great space that we have now, Mark has taken up the home veggie garden with gusto! I can't take any of the credit on this, it really is his baby but visit my post here to see what he has done!
Friday, February 19, 2010
Women in Wine at MCC
 On Wednesday evening I went to my third Women in Wine function at the MCC. This is an annual event where they celebrate women who have made their mark in wine making. This year's winery was Pizzini wines which have an Italian background and are producing wines with an Italian and French flavour.
My favourite wine of the evening was the sparkling Sangiovese rose, which was a fantastic pink bubbly but was quite dry and a little tart in taste. Would make a fabulous substitute to mimosas for a brunch! I'm looking at ordering some of this bubbly so I will add some photos when I do!
We also had an interesting low alcohol wine called Brachetto. I think it's about 5% and is sweet in flavour but still light. Apparently it is great with some ice and pepped up with some Pimm's or even a white rum. Again, I would like to give this a go with some good old Polish Vodka and see what we come up with!
Pizzini winery does several events at their winery throughout the year. I'm very keen to check out the Gnocchi Festival in November so stay tuned for that! For more info on Pizzini wines please visit their website at www.pizzini.com.au and they are located in the King Valley.
Monday, February 15, 2010
New Coffee Maker!!!
After a close friend gave my partner Mark a new Italian style percolator coffee make for a birthday gift last year, that little baby has been getting a work out! I've used the stove top coffee makers on and off for years but had stopped using them for awhile mostly due to having an electric stove and the time. To my fortune, Mark has taken up the cause and makes a pot of coffee every morning! Even if sometimes it does make him a little late for work.
Over the weekend, the poor little percolator had to be retired after Mark had trouble unscrewing it and took to it with a hammer. We then decided to invest in a new one and to spend a little extra money to invest in a good quality percolator.

Over the weekend, the poor little percolator had to be retired after Mark had trouble unscrewing it and took to it with a hammer. We then decided to invest in a new one and to spend a little extra money to invest in a good quality percolator.
This little baby is made in Italy and has some nifty little features, such as a cool touch handle (no more watching Mark in giant oven mitts as he pours the coffee!) and it also has a clear lid so you can see the coffee come out, meaning that you can't over cook it! And it also looks pretty cute too.
Yay for coffee and a big yay to my lovely man who makes it every morning. You can give a barista another job but he'll always be fanatical about making the perfect cup of coffee.
Yay for coffee and a big yay to my lovely man who makes it every morning. You can give a barista another job but he'll always be fanatical about making the perfect cup of coffee.
Saturday, February 6, 2010
Mexican inspired corn salsa

Ok so this is a super easy recipe but really really delicious. I use it on tacos instead of having lettuce, but it also works great with burritos and also sprinkled on top of nachos too. It's very fresh tasting but has some kick, thanks to the hot sauce! It's also a recipe that you can make to taste, especially if you are making larger quantities, so have some fun with it!
Ingredients:
2 fresh corn on the cob - uncooked (you can use a tin of corn kernels also)
1/2 large red onion, finely diced
1 red capsicum, finely diced
good hand full of coriander (cilantro) including stems, finely chopped.
your favourite brand of Mexican hot sauce - you can use Tabasco if you wish.
How to!
- strip the corn of all out leaves, then using a knife, carefully slice the corn kernels off the cob and place into a mixing bowl.
- throw in the red capsicum, coriander and red onion.
- mix ingredients together.
- Add hot sauce to taste.
Tuesday, January 19, 2010
Miss Mardi Muesli bars
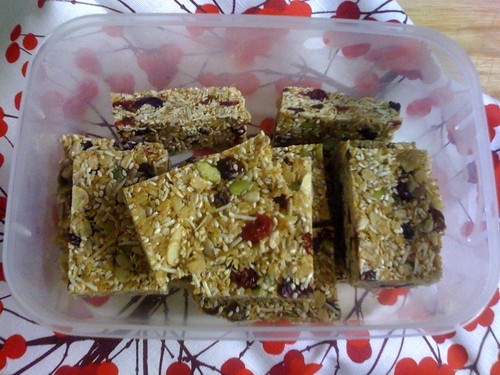
Muesli bars... I love them! this is a great non bake recipe that is a little bit like a sesame snap. The great part is that you can alter the fruit part to what ever you feel like, or what is in your cupboard. I like to do a combo of dried cranberries and apricots, or even chopped dates instead of sultanas!
Trust me... these won't last long!
Ingredients:
1 cup rolled oats
1 cup desiccated coconut
1/2 cup wheatgerm
1/2 cup sesame seeds
1/2 cup sunflower kernels
1/2 cup pumpkin seeds (pepitas)
1 cup sultanas
125g butter
1/2 cup honey
1/3 cup brown sugar
How to put it all together!
- Grease and line a 3cm deep, 16cm x 28cm (base) baking pan with baking paper. Cook oats, coconut, wheatgerm, sesame seeds, sunflower kernels and pumpkin seeds in a frying pan over medium heat, stirring, for 8 to 10 minutes or until golden. Transfer to a bowl. Set aside to cool. Stir in sultanas.
- Cook butter, honey and sugar in a small saucepan over medium heat, stirring, for 3 to 4 minutes or until sugar dissolves. Bring to the boil. Reduce heat to low. Simmer, without stirring, for 7 minutes or until mixture forms a soft ball when a little is dropped into ice-cold water. Add to dry ingredients. Stir until combined.
- Spoon mixture into pan. Use a large metal spoon to press down firmly. Allow to cool. Cut into squares. Store in a foil-lined airtight container for up to 7 days.
Subscribe to:
Posts (Atom)