Sunday, April 11, 2010

Home made granola goodness

Home made granola!

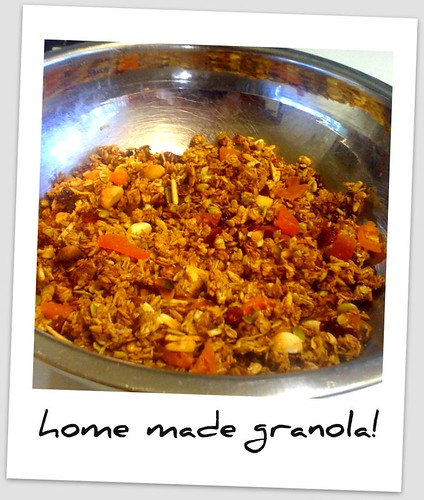
I've always been a fan of a toasted muesli with yogurts. While I was on long service leave in the USA for three months, I became besotted with granola. I ate it everywhere, I even had granola coated french toast (which by the way is awesome!) So seeing I've had all these ingredients floating around for muesli bars, I thought I'd try my hand at my own granola.

As a starting point, I found these great website and used the recipe they posted as a starting point. You can check the original recipe titled Easy Homemade Granola
from "Baked: New Frontiers in Baking" by Matt Lewis and Renato Poliafito on The Amateur Gourmet here! I recommend looking at their site... very cute!

My ingredients:

2 cups rolled oats
1 teaspoon cinnamon
1 teaspoon salt
3 tablespoons or good quality olive oil
1/4 cup honey
1/4 cup firmly packed dark brown sugar
1 teaspoon pure vanilla extract
1/3 cup slivered almonds
1/3 cup macadamia nuts
1/4 cup sunflower seeds

then sprinkling to taste of shredded coconut, linseed and pumpkin seeds, craisins and chopped dried apricots.

How to!

Preheat the oven to 165 Celsius. Line a baking sheet with parchment paper.

In a large bowl, toss the oats with the cinnamon and salt.

In a medium bowl, stir together the oil, honey, brown sugar, and vanilla. Whisk until completely combined.

Pour the honey mixture over the oats mixture and use your hands to combine them: Gather up some of the mixture in each hand and make a fist. Repeat until all of the oats are coated with the honey mixture.

Pour the mixture onto the prepared baking sheet. Spread it out evenly, but leave a few clumps here and there for texture.

Bake for 10 minutes, then remove from the oven and use a metal spatula to lift and flip the granola. Sprinkle the almonds over the granola and return the baking sheet to the oven.

Bake for 5 minutes, then remove from the oven and use a metal spatula to lift and flip the granola. Sprinkle the nuts and seeds over the granola, stir in and return the baking sheet to the oven.

Bake for 10 minutes, then remove from the oven. Let cool completely. Sprinkle the dried fruit over the granola and transfer it to an airtight container.

The granola will keep for 1 week.

I love mine with just plain yogurts and some poached fruit on top... delicious!

Sunday, April 4, 2010

Recipe Remix: A nutty take on Anzac biscuits...

Macadamia Anzac biscuits waiting to go in oven

Finished macadamia Anzac biscuits

I really do love Anzac biscuits. I picked up a large packet of macadamia nuts really cheaply at the supermarket and I've been trying to think of what to make with them!

I decided to lightly roast some of the macadamia nuts in the oven for a few minutes, crush a little bit and add about 1/2 cup of them to my existing Anzac biscuit recipe. Click here to get a refresher on the recipe!

The result? Pretty darn delicious! I don't think that they will be lasting long in our house. I think I've already eaten three!

What do you do when you grow loads of rocket?

What do u do when your rocket crop goes crazy?

The rocket that we are growing in our front garden is going crazy! It is growing at such a rate that we are trying to eat rocket just about every day. It's great though, having your own salad in the front yard where we just pop out with scissors, grab some and make a delicious salad.

I've always been a bit of a rocket fan. I love the slight peppery taste and it's lovely just as a simple leafy salad or slightly cooked in a warm salad.

To use some of rocket supply today, I made this very quick and simple warm salad that comprised of:
  • rocket (duh!)
  • finely sliced red onion lightly cooked
  • roasted kent pumpkin
  • pine nuts
  • potato gnocchi
This was lightly tossed and seasoned with olive oil and lemon juice (to cut through the 'roastiness') and served with fresh shaved parmisan cheese.
A great way to start using up that rocket and also a great Easter Sunday brunch dish.

Friday, April 2, 2010

I want a Japanese Iceball Maker!

(image from here - thank you!)

While researching our Pimm's winter cup recipes, we stumbled upon this Japanese iceball maker. They create a perfectly spherical ball of ice in this machine without using electricity. The only downer is that you need to have a supply of chunks of ice but I think that the outcome is pretty spectacular! I can just imagine myself sipping a Belvedere vodka on 'the rocks' but rather it would be a Belvedere on the iceball or just a Belvedere on the rock (singular!)

The amazing thing is that apparently there were guys who used to make these balls of ice using knives! It was a very dangerous practice and obviously required much skill. This machine means that you won't lose any fingers in the process.

Yep, I definitely want one of these gadgets for my bar!

(thanks to Drinksology for the awesome Youtube clip on how it works!)

Pimm's Winter Cup

Pimm's Winter Cup #3

Mark and I went on a little adventure last weekend to restock our bar. It was starting to look a little low so we popped by our favourite little European style bottle shop and picked up some goodies. We then ventured to Acland Street Cellars in St.Kilda, who are apparently opening up an on-line store soon, very exciting! Anyway while we were in Acland Street Cellars, we discovered that they had not just normal Pimm's Cup #1 but also Pimm's Cup #3!!!

A little educational lesson here... Pimm's #1 is made from a gin base, Pimm's #3 is a brandy base, lending itself to a variety of other drinks; including the Pimm's #3 Winter Cup!

To make yourself a Pimm's #3 Winter Cup you will need:
  • 150ml / 5oz Pimms No. 3 Winter Cup
  • 400ml / 14oz apple juice
  • 1 apple, sliced in to small chunks
  • ½ an orange, sliced in to chunks
  • 1 cinnamon stick
Add all ingredients to a pan and gently heat until just simmering. Remove cinnamon stick and pour mixture in to a large jug. Serve in heat-proof glasses or mugs.

(Thanks to the amazing Oh Gosh website for the above recipe, I recommend you check them out!)

pimms winter cup

While researching more above the spiced and warming Pimm's #3 Winter Cup, we discovered the lovely Pimm's teapot cosy as seen above! They were promotional gifts in the U.K but I may have to pull my knitting needles out and make my own!

So if you are looking for a lovely winter drink to warm you in the cooler months, give this one a go!

Our wedding cake...

Our amazing wedding cakes!

This is a bit of a belated post but my lovely Mark and I got married on Sunday 7 March. It was a small wedding and held at our favourite bar, Baranows Cigar Lounge in Hawthorn. The ever amazing Jess from Sugadeaux (yep, I know, I've posted loads about them!) did our cupcake tower for the day.

As our wedding had a bit of a Deco theme, we decided upon a square cupcake stand and some lovely muted colours and dark browns, which looked amazing in the venue. The topper cake had a ribbon which was held together with one of my brooches.

The two flavours on the day were salted caramel which is one of Mark's all time favourites and the Persian delight which has pistachio and cardamon flavourings... yum! They were certainly enjoyed by all on the day! (thanks to Jess... she really is one of the best cupcake makers around!)

Graffiti and food.. what?!


My sister Shannon put me onto this article as she said that I needed "some street for my food blog'. Thanks Shannon! It's about a German company which has created edible spraycan paint. They have used the idea that if your too scared to go and 'tag' your neighbours fence, you could use this product as it will wash away, or maybe you could lick it away? I'm not sure. It's an interesting idea, especially the idea of using the product to stencil cakes and other food items.

I have to say that I love the image above of the spraypainted gold tomatoes! What a way to spice up a dinner party.

Thanks Miss Shannon for this article!

You may also find this delicious!

Related Posts Plugin for WordPress, Blogger...